
Rear suspension sag – the most important check you’ll make this weekend
Why does setting rear suspension sag matter for enduro and off-road? Enduro21 explains what sag is, what different settings actually do to your bike’s handling and helps you set up your own bike with a simple, real world test and guide.
The most important chassis check you should be making for your enduro bike? That’s what many suspension experts will tell you about sag – a basic measurement of suspension movement from resting to fully extended. Depending on how you have it set (or not) it’s something which can dramatically affect the handling of your bike for the better or worse.
Why should we care about rear sag? For your bike to do what it should well, it should be balanced between front and rear, how it ‘sits’ on its wheels. And because the main way to balance a bike is through the back end, the rear suspension, we’re focusing on shock absorber sag to help you set up your bike better.
“Having a bike navigating smoothly and comfortably around a track is important,” says our go-to suspension guru, Chris Hockey at Kiwi’s Bike Shop. “You can change springs or valving and have it set a bit too hard or soft and can still ride at speed. But if the bike is too high or low at the back it won’t track ruts or turn as well. It’s the most important element.”
He adds, “you be amazed how many riders spend thousands on upgrading their suspension and then never check the sag, they’ll ride all year with it and never once check it.”
More or less sag, what difference does it make?
The basics are simple: with a lower back end, more sag, a bike will be more stable, kinder on bumps and longer turns, plus be easier to track through ruts. With the opposite set-up, less sag and higher at the back, you have an agile, fast steering bike.
You can liken it to the difference between a trials and beach race bikes. They are two extremes of off-road geometry: a trials bike is all about sharp steering and front wheel control. Meanwhile a sand bike has long forks, is low at the back and has stability for days.
Here-in lies the problem for enduro though, sometimes you need all that in one. An enduro can have extreme, motocross or sandy conditions all in one day’s riding.
A better-balanced bike
Because enduro is often a mixture of all types of riding, getting your bike set-up with a “good base setting” (as you’ll often hear racers saying) is the starting point. It’s the first step because it will help you feel more in control in different riding conditions.
Being able to confidently make a quick change of sag settings for different conditions will be a huge step to getting a bike under better control no matter where you ride.
How to check, measure and set sag
The first thing is to see what you’ve got. Measuring is possible on your own, but it is easy to be inconsistent or make an error, so this is best done with a helper – if you have no option but to do it alone then make sure you check and recheck your measurements for consistency.
Static and rider sag? To get a full picture of your rider sag we take three measurements: a bike on a paddock stand (rear suspension fully extended), unladen resting on its wheels, and with a rider onboard with wearing riding kit.
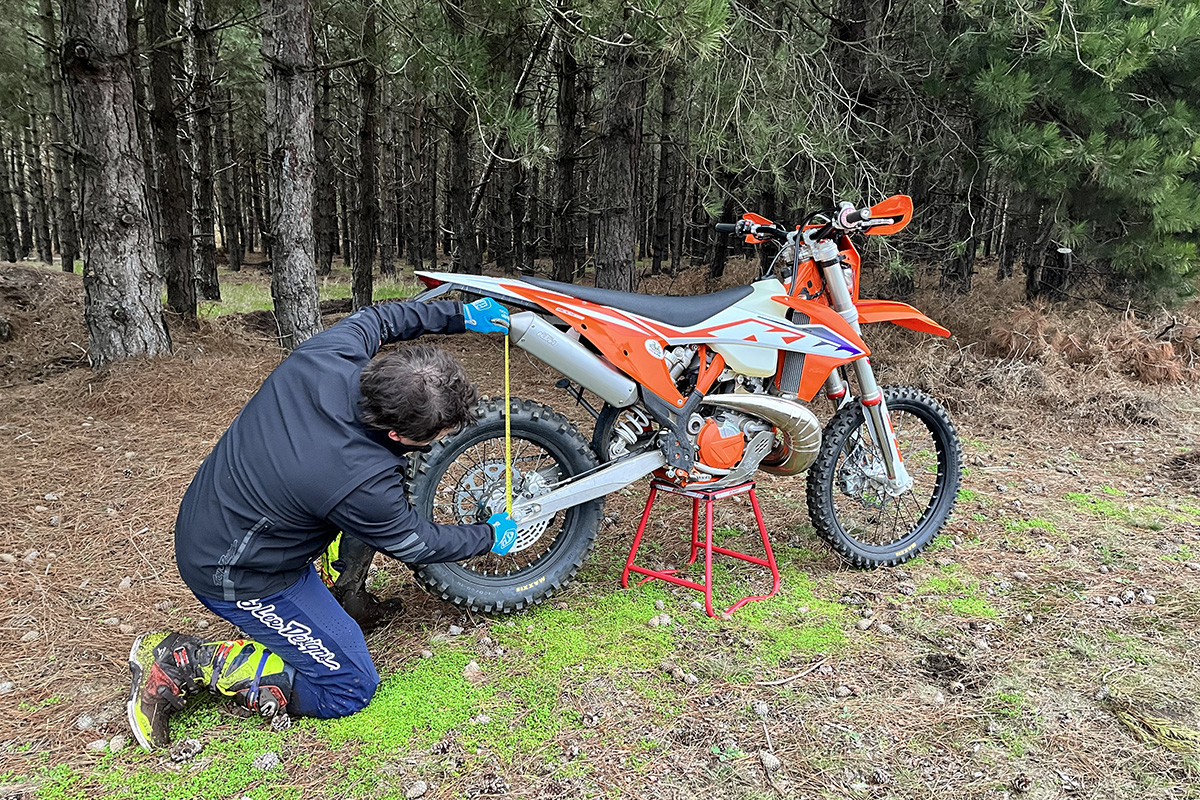
Measuring sag
There are special tools for measuring sag but ultimately it doesn’t matter if you use a $100 measurer, a tape or a piece of wood. The point is to set it to fixed points on the axle end of the swingarm and rear fender or subframe and to be accurate.
Chris is using the tried and tested tape measure here and, so long as you measure from the same place each time it has the same result. In this case we took measurements from the silencer end cap and the highest point of the rear axle bolt.
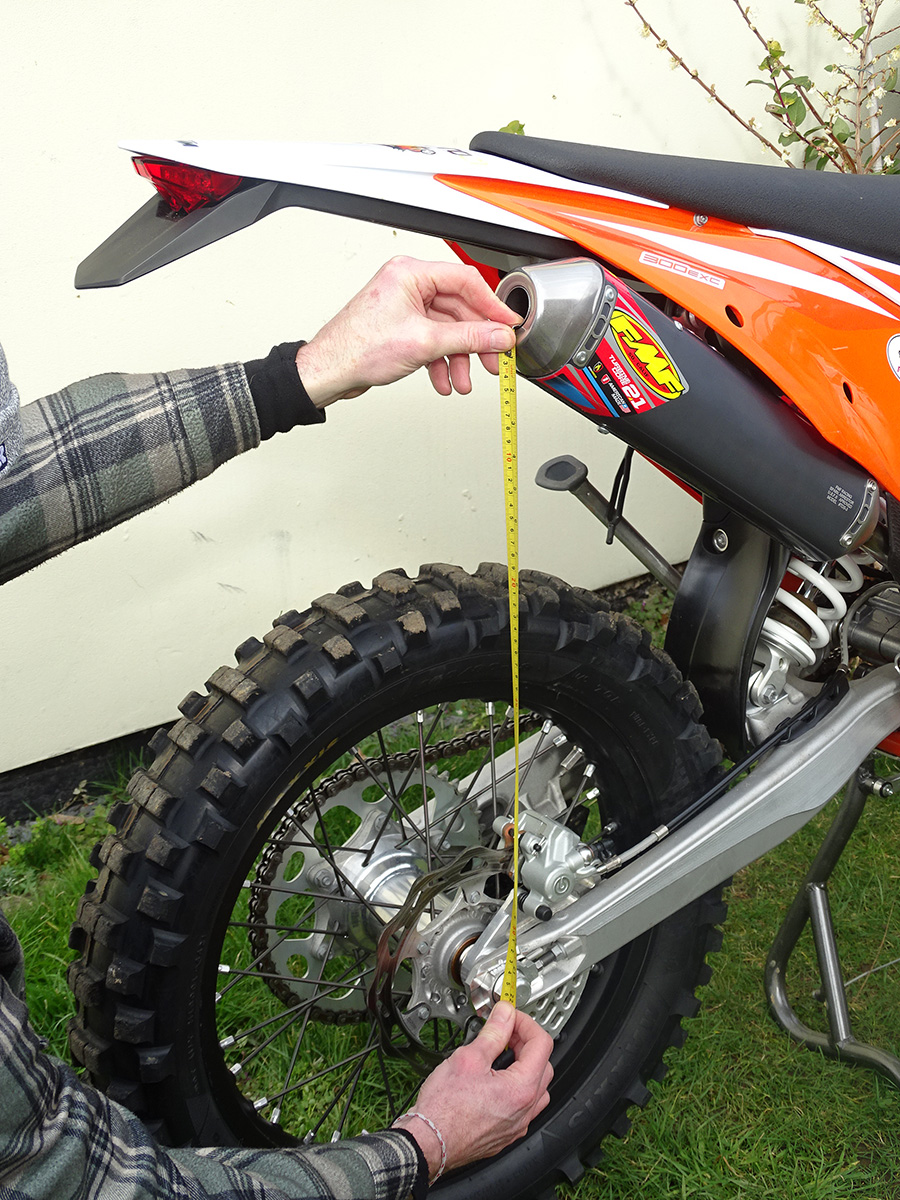
- Make sure the bike is sat still, upright and the suspension is in its natural resting place
- Take measurements with it on a bike stand and off it – this gives you two static sag measurements
- Subtract one from the other to find the difference and hey presto, this is your basic sag
- Refer to the manual for standard settings
Too little…
Starting with bike on the stand, our 2023 KTM 300 EXC measured 53.4cm. With the bike then on its wheels (off the stand), letting it stand upright but without applying any weight, it measured 50.5cm. Take one from the other and we had 31mm static sag which is less than recommended by KTM by around 5mm.
Now measure rider sag
This is simple as well but certainly is a lot easier with two people. The rider should be wearing normal riding kit – it all weighs more than you think so it’s important you sit oin the bike at your usual riding weight.
To take this measurement, the rider sits on the bike in the middle, compressing front and rear suspension evenly, with no brake on and with a foot up on the paddock stand to help you balance (but importantly don’t take any body weight off your backside).
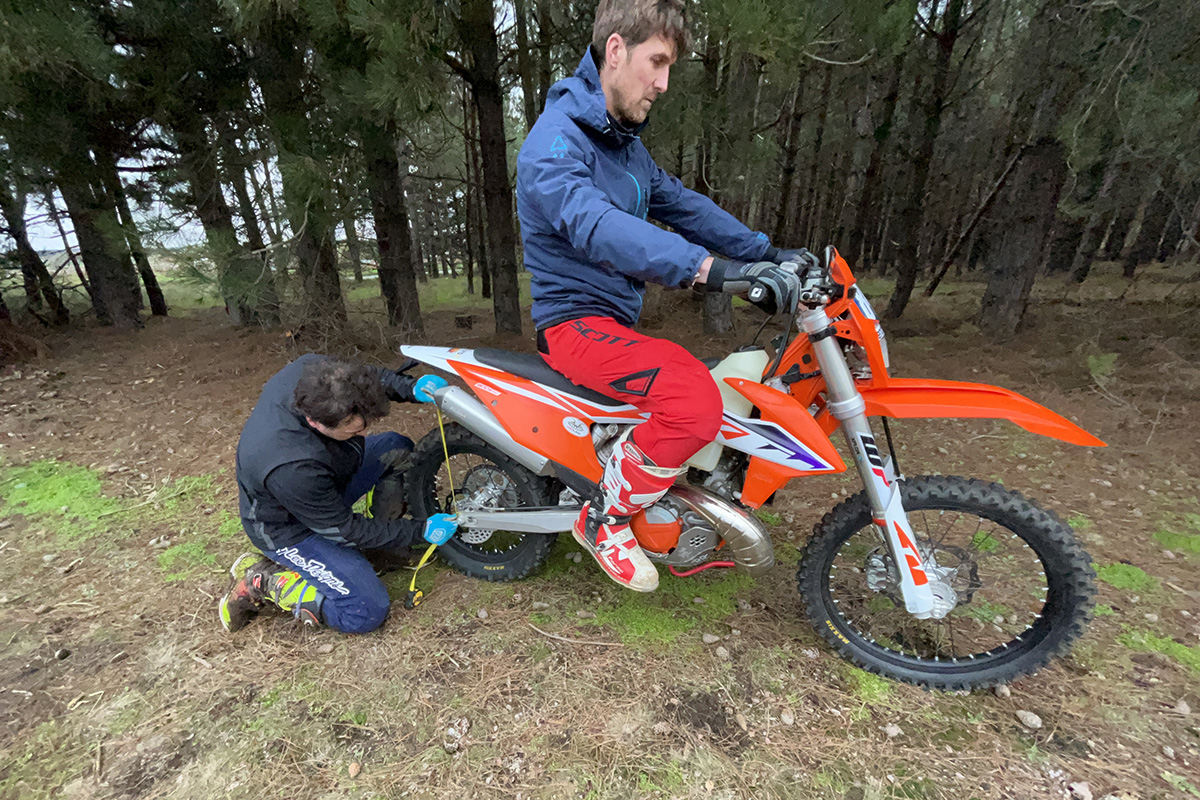
Measuring in the same place, our rider sag was 42.6cm so, using the first measurement of 53.4cm and subtracting, the rider sag we have is 108mm.
Most manuals are a good guide
Chris reckons most bike manuals are good with their guide sag settings which are usually between 35-40mm for static and 105-115mm for rider sag, no matter which manufacturer.
KTM/Husqvarna/GASGAS two strokes like this are 35mm and 110mm respectively but it can vary depending on your year model and whether it is a two or four-stroke so check yours.
What did it feel like?
From the measurements we took, already we had too little sag on this bike. The main problem this bike is suffering from is moving too much at the back and though a healthy amount of that is down to the soft standard EXC spring and valving compared to my riding speed at the tough test track we used, a really strong reason for that excess movement is too much sag, it is sitting to high.
Those few millimetres difference might not sound like much, but it translates dramatically on the track. Basically, before adjustment it felt nervous on a straight and was prone to head shake.
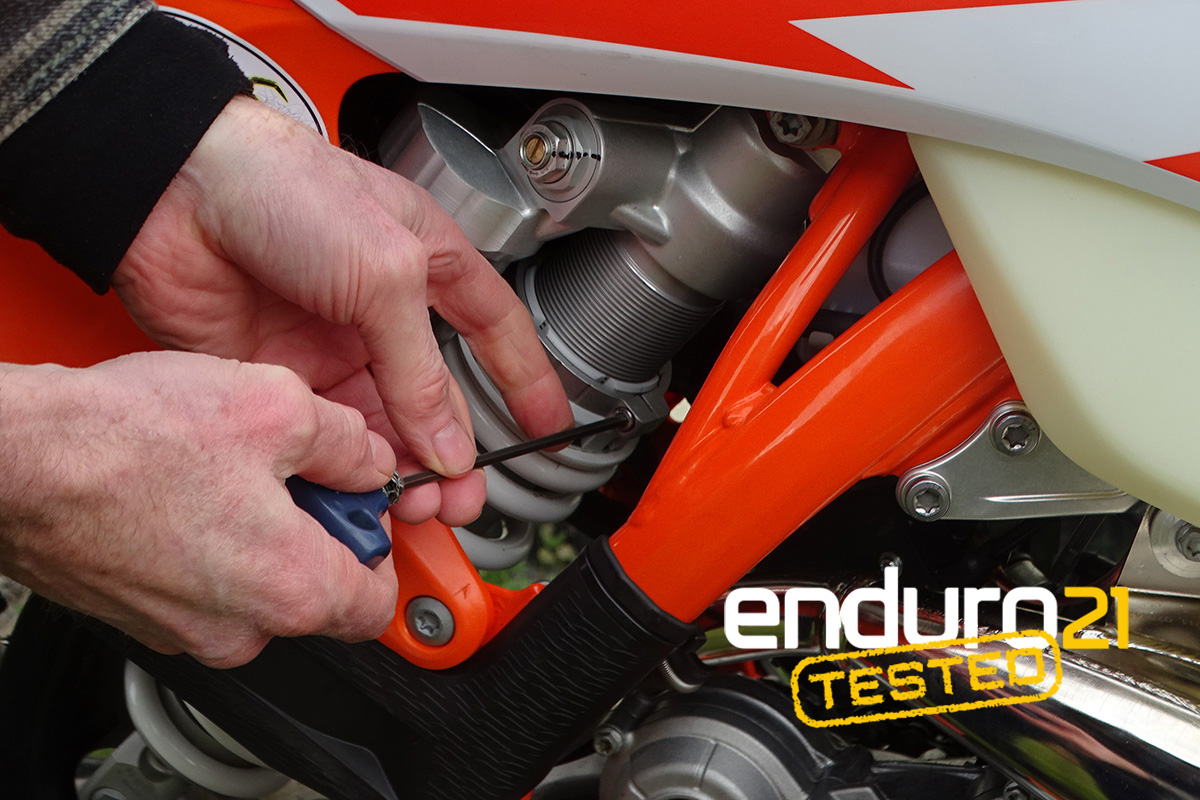
Adjusting the shock preload
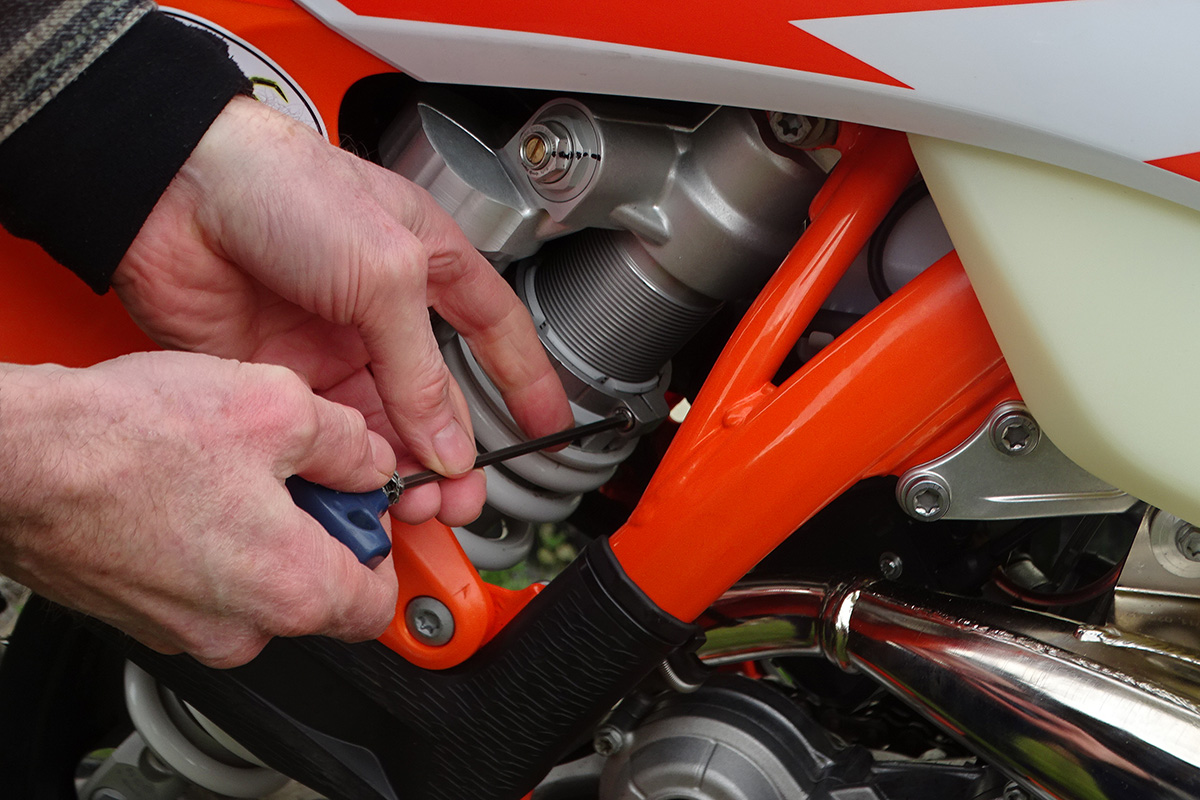
Sag is adjusted by changing the preload and with a shock absorber that usually means two locking nuts sitting on top of the spring. Put the bike on the paddock stand to do this to remove preload on the spring.
Loosening the top nut, or holding clamp as in the latest WP Xplor unit, lets you turn and adjusting the bottom nut using a shock preload tool which locates in the notches.
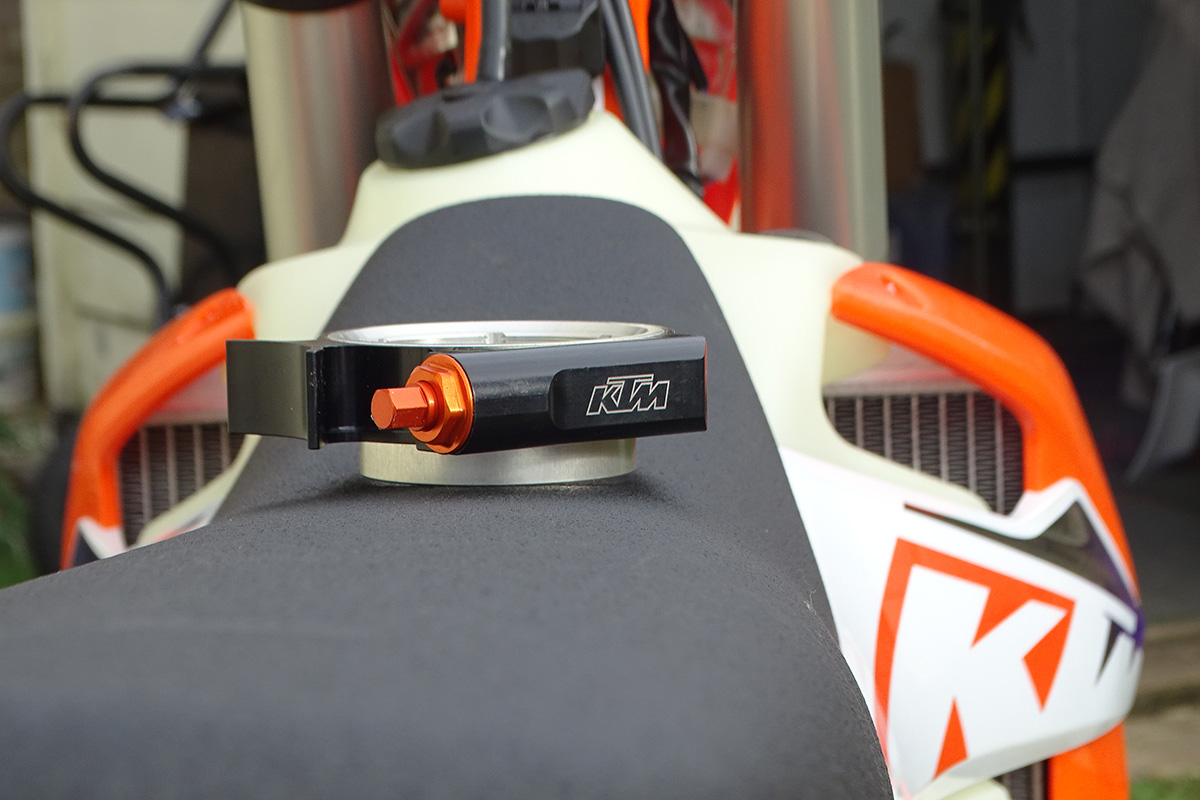
There are also pretty handy manual adjusters available like this one below from the KTM Power Parts catalogue which makes adjustments super-easy and accurate.
One whole turn of the stocknut is about 5mm (ish) as a guide, but do it and then measure sag again to be accurate. Reference back to initial measurements.
We made an adjustment of one whole turn, so 5mm static sag to bring it marginally over standard recommendations and then went for a ride.
What difference did it make? Exactly as Chris promised, the bike was suddenly happier handling the track and easier to ride. His test track is horrible to be honest. A twisting slot through the trees, rutted, whooped in places and bloody hard work!
Hard to ride but great to test and train on is the point and even with this seemingly small adjustment of 5mm extra sag at the back, the EXC was more willing to hit the ruts in the turns, more controlled on the bumpy straights.
It’s not night and day different but the point is to have this bike as good as it can be with a basic, regular check which takes a minute.
Once you have standard sag setting nailed on your bike, you can then try and work with adjusting both it (the sag) and then compression and rebound settings to get a better personal feeling. The base setting, underlying it all though, is the sag.
Big thanks to Chris Hockey at Kiwi’s Bike Shop for the experience and set-up advice.
Photo Credit: Enduro21